About Me

My photo
Liverpool, Liverpool, United Kingdom
I have been crafting since May 2008, when in desperation to find an unusual birthday card for my Mum, I gave up looking in the shops and decided to have a go at making my own. I soon realised that crafting is addictive and I haven't brought a card since. In 2011 I completed my certificate in papercrafting as a result of the work I did as part of the course I started entering challenges on line and in magazines. I applied for design teams and also started making samples for Ooh La La Creations for their shows on Create and Craft. I have now completed my Diploma in professional crafting and most recently been runner up in the Papercrafter of the Year 2013 a competition run by Papercraft essentials magazine, I don't have a particular style I like to use elements from lots of styles and techniques, although I do love all things vintage. In 2014 I started to move more towards scrapbooking to take care of the huge family archive of photographs that were stored in my attic. I have continued cardmaking and Scrapbooking through 2015 and 2016 but have also become interested in off the page projects. I hope to be able focus on these in the future.

Saturday 31 December 2011

Recycling

Well this will be the last post on my Blog for 2011, Thank you to everyone who has commented on my work over the past few months and I look forward to keeping in touch with you all in 2012. I hope you have all had a wonderful Christmas and that the New Year brings you all you hope for.

I have been busy recycling bits and pieces in my card making this week starting with this card made from a section of pretty wrapping paper


The beads and metal embellishments on the card are from old bits of Jewellery that I have picked up in Charity shops and the flowers were from an old head band.
I just used the embellishments to make the central butterfly on the wrapping paper stand out.

I also put all the family gift tags to good use once the Christmas presents had been opened this year. I was able to make 15 Christmas cards towards next year's tally, all the backing papers and greetings were left overs and off cuts from this years Christmas crafting frenzy, and working on these also served to fill the moments when the Christmas TV hits rock bottom and there's nothing worth watching


All that leaves me to do is wish everyone a Happy New Year and I'll see you on the flipside
Alli xxx

Sunday 18 December 2011

50 Golden Years


Earlier this year a work colleague and good friend told me that she needed a really special card for her parents Golden Wedding Anniversary in December. She wanted something different but something they would want to keep. I suggested a boxed card that included a photograph of her parents on their wedding day, which she thought was a lovely idea. Having visited the Creative Stitch and Craft show at Aintree in May   I had seen the Glitter Girls demonstrating their embossing boards and had treated myself to the bookatrix board and the box template board.

After a couple of false starts, due to me having the box embossing board upside down because I had tried to do it from memory. All else having failed I read the instructions and turned the board the correct way and found it was in fact incredibly easy to make the box. I decorated it using parchment that I had embossed using one of the Marianne designables folders through the sizzix and the hearts were cut using a x-cut aperture cutting and embossing folder. These were trimmed using pinflair flexible peeloffs and a sentiment was added on piece of pearlised ivory card. The golden pearls I made using pearl paint and by squeezing it onto a non stick craft mat I could get them all the same size once they were dry it was simply a matter of peeling them off the mat and attaching them using a dab of pinflair glue gel. The flowers were from Wild Orchid crafts.


For the card I used pearlised ivory card stock as the base and various patterened papers for the pages each was edged using dew drops brilliance gold ink before being stuck down to form the book. I wrapped cream crotched lace ribbon around the spine and finished this with a piece of gold satin ribbon to cover the join.

My husband had been watching intently and pointed out that whilst the card was lovely there was no where to write on it, I over came this by using a heart the same as those on the box lid and stuck this over the corner of  an envelope which could then be stuck to the card to form a pocket, I used an off cut of cream hammered card trimmed to the correct size to slip inside the pocket which my friend can remove to add her greeting to her parents and then slip back inside.


I again used flowers from Wild Orchid to decorate the corner, and also added a spray of pearls I had in my stash.

On the other side of the card I used a plain oval die cut from x-cut to cut out the wedding photo of my friends parents which I had printed from my computer. again flowers and pearls were added to balance the sides of the card.

Whilst the finished card looked lovely lying flat in the box I wanted my friends parents to be able to display it to friends and family at their golden wedding celebration so I made an easel card base to the same size as the box and lines the inside with some lovely handmade golden paper from my stash and added a heart cut from cardboard as a stopper so the card could stand up for display.


I really enjoyed making the card for my friend and I am keeping my fingers crossed that when she gives it to her parents at the end of the month they love it as much as she did when she saw it.

I have to admit having looked at these type of cards for a couple of years since I started making cards I had always considered them well beyond my capabilities and whilst it took a long time to make due to the number of layers and the amount of die cutting it really was quite straightforward and I'm planning my next one already.

Saturday 17 December 2011

Craft your Passions Holiday Havoc Blog Hop


Welcome to Craft Your Passion Challenges "Holiday Havoc 2011" Blog Hop!!
We are very excited about holidays and wanted to add to the chaos and havoc. What better way to do that than to have a BLOG HOP!!!
If you have hopped over from Roro's, then you are in the right place. If you just happened to stop by and would like to join our hop from the beginning, please go to Craft Your Passion Challenges and follow along for a chance to win some AMAZING blog candy along the way and PRIZES at the end.
All Craft Your Passion DT members are going to be playing along in the hop with some very special guest designers.
Each designer along the way is featuring a project that showcases a digital image from at least one of our amazing Blog Hop Sponsors.
What’s more exciting is you can participate too by creating a project and linking it up over at Craft Your Passion Challenges for a chance to win one of several prizes.

But, there’s a twist. Be sure to visit all the stops and leave a comment (we will be checking). Once you have finished the hop, we would like you to create a HOLIDAY project using at least one digital stamp and enter it with our Linky tool.
While you are hopping, be sure to check out the blog candy the designer's have to offer you. You don't want to miss out on any of it!


I have created the two cards below for the blog hop.

The first I kept to traditional colours and used Papermania watercolour markers to colour the image which is from 
Once I had coloured the image I cut it out and mounted it on a large label cut using the sizzix bigshot and xcut large label die, which I edged in gold ink and then mounted onto red card, and green spotty paper before adding the flower and holly embellishments from items in my stash.

For the second design I used contemporary colours and lots of glitter 


This digistamp is from 

Again it was coloured with papermania water colour pens and given a liberal sprinkling of glitter before being mounted on pale pink and blue snowflake papers from my stash. The flowers are from Wild Orchid and the pins I made using recycled beads from old jewellery. 

Please leave a comment and then hop over to Zahreen's  blog to see what havoc she has created 


Here is the hop list in case you get detoured along the way

  1. Craft Your Passion Challenges http://craftyourpassionchallenges.blogspot.com/   START
  2. Jenn http://scraphappensembellishit.blogspot.com/
  3. Shannin http://shanninscreativecorner.blogspot.com/
  4. Christine http://happyscrapper-sweetpeacards.blogspot.com/
  5. Cathy http://creativecathy.blogspot.com/
  6. Amy http://cavycouturecrafts.blogspot.com/
  7. Christy http://christyszaneycreations.blogspot.com/
  8. Joanna http://scrapjoanny.blogspot.com/
  9. Torrey http://left-field-studio.blogspot.com/
  10. Jenny http://cookieadventures.blogspot.com/  
  11. Doreen http://www.doreensdream.blogspot.com/ 
  12. Jodi http://kaboodesigns.blogspot.com/
  13. Lisa http://craftybunny.wordpress.com/
  14. Joyleen http://joydianne.blogspot.com/
  15. Melissa http://expressionswithearthspirit.blogspot.com/
  16. Emma http://www.paperaddictsanonymous.blogspot.com/
  17. Joanne http://www.bigislandlady.blogspot.com/
  18. Gemma http://gemslittlecreations.blogspot.com/
  19. Lizy http://lizyshouseofcards.blogspot.com
  20. Joanna L http://www.mycraftingcorner-jo.blogspot.com/
  21. Helen N http://craftinghelen.blogspot.com/
  22. Natali  justbecozoflove.blogspot.com
  23. Julie http://julieprice3.wordpress.com
  24. Helen W http://crafty-mamma-mia.blogspot.com
  25. Alethea http://lilodesigns.blogspot.com
  26. Arielle  soccermom5982.blogspot.com
  27. Lisa G lisa-scrappingspot.blogspot.com
  28. Jan http://scrappyscatty.blogspot.com/
  29. Karen http://karensdigi.blogspot.com
  30. Mandy http://amandacruxton.blogspot.com/
  31. Jennifer http://justcoffeepleasestampsribbonspaper.blogspot.com/
  32. Jacqui  http://thepoodlesdoodles.blogspot.com/
  33. Dawn  http://cherrytreestudio.blogspot.com
  34. Roro http://rorobuildingdream.blogspot.com/
  35. Allison http://allidcards.blogspot.com
  36. Zahreen  http://splashbunny.blogspot.com
  37. Sarah http://sarahsassy468.blogspot.com
  38. Sue http://confessionsofapaperhoarder.blogspot.com
  39. Tracey http://craftyfox.blogspot.com/
  40. Julia http://paperandscrapscreations.blogspot.com/
  41. Craft Your Passion Challenges http://craftyourpassionchallenges.blogspot.com/  END

Friday 9 December 2011

Using up some Freebies


Whilst sorting out my stash to get the house tidy for Christmas I came across a box full of free papers toppers and embellishments, which I have collected from various magazines over the past few months. So I decided to have a go at making a card entirely from these elements without using anything else from my stash. 

Even the base card which was recycled from the packaging and the glitter were freebies. 

I have decided to enter the card into the following challenges.

Thursday 8 December 2011

A little bit of Punk

A very dear friend of mine celebrates her birthday soon and I was at a loss as to a design for her Birthday card. She loves late Victorian and early Edwardian style, is quite artistic and sews, but also enjoys anything mechanical especially her motorbike. I had thought about creating a card in the 'steampunk' style something I had never done before and this would be perfect for the mechanical/Victorian parts of her personality, but all the cards I had looked at to try and get some inspiration seemed very masculine and not at all suited to her feminine side. Thank goodness I picked up issue 91 of 'Simply Cards and Papercraft' they had an article on creating feminine looking cards in the 'Steampunk' style. They also had a wonderful article on using decorative pins and how to make them so here is what emerged as a result of reading those two articles.


I didn't really have a plan when I started the card, and in the end it came together surprisingly easily, it also gave me an excuse to visit my local craft shop and indulge myself in a new Tim Holtz cutting die, and the new printed book range of urban stamps from Papermania.

I started with a 8x8 in square card as I felt this shape and size gave the most scope for arranging the number of elements I wanted to include. The whole colour scheme was driven by the topper of the little girl which I fund in my stash and was left over from a previous project, it originally had a gold border but this was too bright and I cut it off.

I used Dew Drop brilliance silver ink to stamp the keyhole design from the birds set of papermania stamps, and the wings onto white card and left this to one side to dry. I also used silver ink on the edges of the backing paper which is from the Vive Gade 'Skagen' range of papers. It is a lovely soft grey and white lace design. I also used this paper for the dress form, I cut the shape 4 times using the Tim Holtz die and a sizzix bigshot. I then layered these up to give more rigidity and dabbed them all over with Tm Holtz distress ink Tumbled glass followed by concord grape, and finally edged the whole piece with silver.

Once the keyhole stamped image was dry I cut around it by hand being careful to leave an even border around the edge of the image, the centre was inked in tumbled glass and the edges with concord grape. I also decided that the silver wings I had stamped looked too flat so over stamped them using staz on ink in stone grey to give more definition before cutting them out.

I also printed off the image of a pocket watch from my computer and coloured this in silver, before cutting it out to use as a mount at the back of the sentiment which had also been printed on the computer.

I wanted to make the dress form stand out from the background so used an off cut of purple metallic card from my stash. The card was embossed with swiss dots and therefore gives interest.

I positioned the purple card panel the little girl topper and the key hole on the card without sticking anything down and then I raided my 'that might come in useful' box in my stash for embellishments. Which were sourced as follows.

The cogs were from the Tim Holtz range

The key was actually one of several I have which were originally sold as a necklace in Primark - it only cost a couple of pounds and broken down provided me with 8 lovely metallic key embellishments all different. They aren't heavy so don't over balance the card.


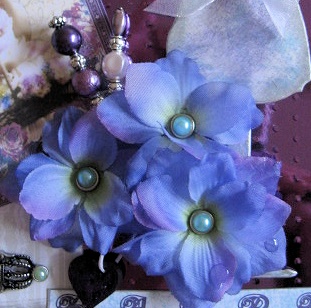
The flowers were from a local store that sells stems of silk flowers at very reasonable prices they were from a stem with over 30 blooms on it and work out at  a few pence each.

The decorative pins I made myself using long jewellery pins and beads that I have recycled from old jewellery - Charity shops are a great source for these and there are some really unusual beads out there. The beads are stuck to the pin using glossy accents, by squeezing a small amount onto the shaft of the pin and then pushing the bead up over it and leaving to dry

The brads were from my stash and I used slightly different shades of the pale blue for the flower centres and the top and bottom of the key plate.

Once I had found everything I played for about an hour until I was happy with the composition and then I secured everything to the card. The embellishments were glued on using collal glue gel as this works really well with irregular surfaces and gives a really tight bond.

The finishing touch on the flower petals was to add 2 water droplets using glossy accents to the petals as shown below.


I really enjoyed making this card and am itching to make more in the same style. I have never been one for the less is more approach and love the way so many different elements can be brought together on this type of card.